 |
A protractor cannot be used to produce a formal geometric "construction". It can |
| however, be used, along with a ruler, to produce "drawings". |
|
|
 |
Let's look at examples of how to "draw" geometric figures given certain conditions. One method of creating the drawing will be shown. There may also be other methods of creating the drawing.
For these examples, we will define the term "draw" to mean "to create a drawing using the tools of a ruler, and/or a protractor". While freehand sketching can be beneficial, we will not be doing freehand on this page.
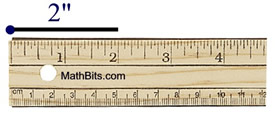
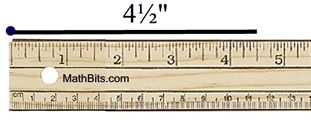
| Example 1. Draw segments of lengths 2 inches and 4½ inches. |
This task is easily accomplished using a ruler.
Mark a starting point on your paper. Position that point at "the starting point" on the ruler and draw the segments. Be sure you "know your ruler". Know what spacings the marks represent.
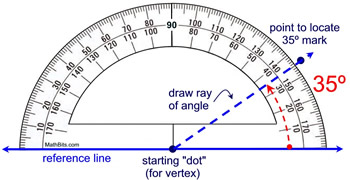
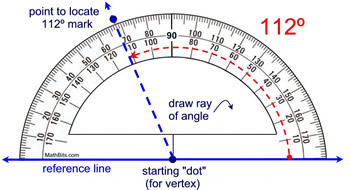
| Example 2. Draw
an angle of 35º and an angle of 112º. |
Grab your protractor and ruler. With the ruler, draw a reference line to start the drawing.
Mark a point for the vertex of the angle on the reference line. Use the protractor to draw the angle.
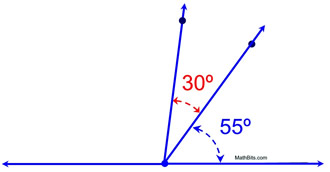
| Example 3. Draw
two adjacent angles. One angle is 55º and the other angle is 30º. |
Remember that adjacent angles are angles that have the same vertex, share a side (ray) and do not overlap. We will accomplish this task with two applications with the protractor, drawing one angle at at time. Draw a reference line to start the drawing. Mark a starting point for the vertex.
Step 1: draw 55º angle 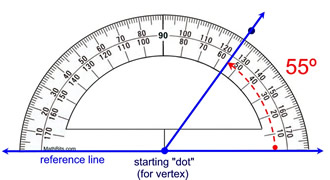 |
Step 2: draw 30º angle
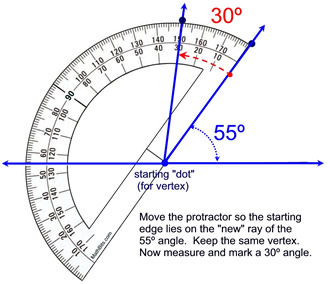
Step 1 and step 2 can also be done in one step, marking both angles. Place a dot mark at the 55º angle, then move an additional 30º on the protractor and place a mark at the 85º angle on the protractor.
|
Step 3: Done
|
| Example 4. Draw
a rectangle with a length of 6 inches and a height of 3 inches. |
We need to guarantee that we have right angles at the vertices of a rectangle.
Draw a reference line to start the drawing. Mark a starting point for the left vertex.
Measure 6 inches on the reference line as the length of the rectangle.
Draw a 90º angle at each end of the 6 inch segment.
Step 1. Measure the 6" side and draw the right angles at each end.
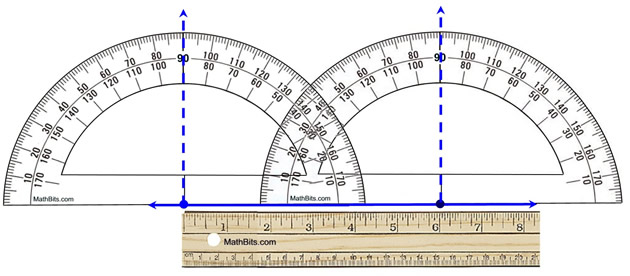
Step 2. Measure the 3" sides on the 90º rays.
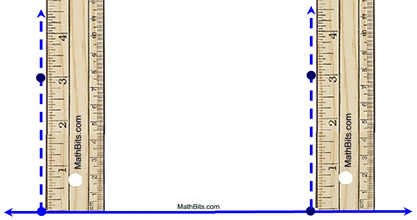
This height of 3 inches can also be marked off using a compass. Spread the compass to match 3 inches on the ruler. Then mark off this length on both 90º rays.
Step 3. Connect the dots.
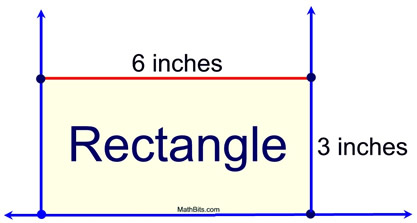
Step 4. Use your protractor to measure the last two right angles as a check that your 3" segments are of correct length to create 90º angles.
| Example 5. Draw
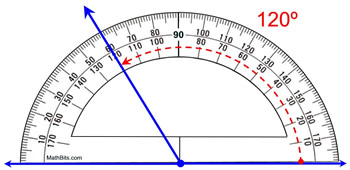
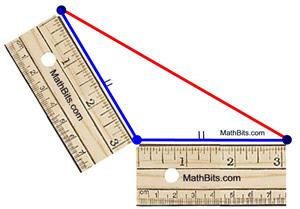
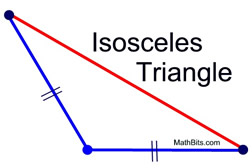
an isosceles triangle with a vertex angle of 120º. Use the ruler to establish the length (of your choosing) of the legs. |
Remember that an isosceles triangle has two sides of equal length. The vertex angle of an isosceles triangle is the angle between the two legs of equal length.
Draw a reference line to start the drawing. Mark a starting point for the vertex angle.
Use the protractor to draw the 120º angle.
Using the ruler, mark off equal lengths on each ray of the angle.
Draw the isosceles triangle and label the equal length legs with hash marks.

NOTE: The re-posting of materials (in part or whole) from this site to the Internet
is copyright violation
and is not considered "fair use" for educators. Please read the "Terms of Use". |
|
